Showing posts with label parts. Show all posts

Wednesday, March 23, 2022

Transhuman Cyborg Stock

Transhuman Cyborg Stock

Investors have made possible the advanced stocking of machine AI components for the Transhuman Project.

This includes numerous AI machine interfaces ready for construction and implantation for advancing future months of operations.

The advanced AI Big Brain Machine Laboratory is one of the most advanced brain lab institutions in the world, working on unique and creative methods of bio matter brain transfer into longevity machine retention vessels for potential intellectual immortality. The lab is already fully stocked with numerous machine brain vessels, to be used as experimental neuro retention units. Some are in excess of 240,000 neural processing centers while others are experimental for transferring the human brain Cortex. When commercially available, the brain transfer system will enable future genius minds the equivalent of Einstein, Jobs, and Musk to preserve their neurophysiology for infinite ongoing future benefit of human species on multiple worlds.

Tuesday, July 14, 2015

New USA Space1 Rocket Lab

NEW USA SPACE1 ROCKET LAB
Established recently in the USA, the new rocket lab is busy stocking up on rocket parts and supplies to assemble a total of five new rockets.

RESEARCH VEHICLE
One research vehicle among the fleet is a rocketing space shuttle that will ferry supplies, test equipment, and possible astronauts back to earth. The design originated many years ago but only now do we have working vehicles to fly.

SHUTTLE DESIGN
The shuttle design is a gliding vehicle, and does not carry volatile rocket fuel, making it reusable for more safe landings. Automatic design parameters enable the vehicle to return on its own.

ROCKETS
Other rockets range in size from four different diameter and height dimensions. The largest rockets designed appear to have heavy lift capability for multiple equipment bays or multiple astronauts.

ROBOTICS
Space1 is heavy into advanced space flight robotics. The robotics division is already vastly equipped in both Taiwan and USA locations.

LAUNCH COMPLEX
Also equipped with parts for two launch sites, the liftoff pads have varying capabilities depending on rocket size. Control panels will be spaced at safe distance from the launch rockets and towers.

ROCKET MOTORS
Highest reliability rocket motors are purchased from a reputable professional rocket motor corporation pre-made and ready for precision installation into rockets at the time of launch. A total of fourteen rocket motors are now within Space1 inventory.

These will be used for primary launches and rocket tests. Four motors in the engine lot are the most powerful ever purchased and just within affordable means at this time.

These motors require lead delivery times and special shipment procedures, and will produce the highest rocket thrust and space altitudes ever reached by Space1's fleet of rockets.

Under consideration now is the increase of rocket penetration into space by the addition of thruster boosters, that not only extend space flight duration, but offer more space tourism during the mission.

LINKS
Space1 Web Content Links in January 2015
http://humanoidolabs.blogspot.com/2015/01/space1-links-in-january-2015.html

Wednesday, February 4, 2015

Space1 Model Space Program Part 2 Rocket Parts

SPACE1
MODEL SPACE PROGRAM
PART 2 - ROCKET PARTS
Last time we introduced the idea of running your own space program at the small model rocket hobby level. This time we will look at finding some parts to build your own rocket at extremely low cost.


Eggs make perfect nosecones
OBJECTIVE
The first objective is to collect together all the parts needed to build a rocket. It's estimated a small rocket (1.5 or 1.75-inches in diameter) can build for about $3 using common materials. A larger 2.5-inch rocket could cost about $5. This compares to store kits ranging from $20 to $50.

You will need some extra things like a motor and a launcher, and we'll talk about these things in more detail later.

Some parts come in packages with enough material for several rockets. Some parts are purchased as "spares" for future rockets of varying sizes. We will calculate the cost of each part used, for just one rocket.

TRIP TO THE DOLLAR STORE
Ok, so let's make a quick trip to the dollar store to make our first purchases. We found three different size eggs. Although there is no such thing as an Easter egg in Taiwan as Easter is generally not celebrated (most people are atheist or Buddhist), packaging in the shape of an egg was found.

Two smaller egg packages held a kind of silly putty and the largest egg held a LEGO knockoff copy by the Chinese brand Wange. The larger egg contained many small treasures, ideal for building rocket devices and a tiny surprise. More on this later.

NOSECONE
The first purchase was an egg shaped package for the rocket nosecone. This was found in 3 sizes, small at 1.5-inches diameter, medium at about 1.75-inch and a large at 2.5-inches. The cost was 15, 20 and 80 NT dollars respectively. This amounts to USA cost of $.50, $.66 and $2.66.A toilet paper roll tube is 4-inches long, a diameter of 1.75-inches and perfectly fits the medium size egg.


Rocket shock cord from elastic band
ROCKET SHOCK CORD
The final item purchased is elastic for sports pants waist band. Number 2 is the width size at .25-inch and 20 yards is the length. It should be enough elastic shock cord material to make 40 rockets. The cost is NT$40 or US$1.33. That figures to about US$.04 per rocket.

As this has an exterior fabric base it will be fireproofed for protection against the ejection charge. However, we are working on a new design that insulates the parachute and the shock cord from the hot ejection charge. More about this later too.

The material has a stretch rate of 
6-inches at rest and stretches to a max of one foot long. The material is rather consistent in this regard, with a ratio of 1:2 as 1-foot will stretch to about 2'2". The material has a stable spring constant, as a test, stretching a six inch length fifty times, has no apparent deviation. Breaking point is undetermined. In a poundage test pull, the material did not break under 200 pounds momentarily applied.

Wednesday, January 14, 2015

Space1 Rocket No Fire Mastic

Space Tourism
SPACE1 ROCKET: SAFE NO FIRE MASTIC NFM


SAFE NO-FIRE CHEMICAL TREATMENT FOR ROCKETS

Rockets can be compared to ocean liner ships, automobiles, and trains, as internally they use material which may be prone to fire. For rockets, Space1 carefully selects fireproof materials, and uses its own invention of fireproofing material called No Fire Mastic or simply NFM.

— Space1 is known for its development of the space safety rocket, a safe way of going into space for space tourism.

After one full year of testing and formulation, NFM has emerged as the best choice when assembling and fireproofing rockets and rocket material. The mastic is best applied to materials that can absorb a degree of moisture with a saturation ability.

Use of No Fire Mastic is as simple as spraying it on readily absorbent surfaces or soaking materials for an extended period of time. The formula for mixing batches of NFM is slated for publishing in Space1 Magazine issue number 4.

Monday, December 23, 2013

FM Radio Station Part 3 Assembly & Tips

Fully assembled and ready for testing, the FM transmitter radio station is shown with a potential cabinet housing. Note how the microphone is repositioned top side for ease of positioning inside and through the yellow cabinet.
assembly and tips
HOW TO BUILD YOUR OWN FM RADIO STATION TRANSMITTER PART 3

PARTY TIME!!! Today is a solder party. Get out your guns (soldering guns) and prepare to melt some metal, putting metal (tin) on metal (copper).

Tuning the frequency
By a bit of trial and error plus observation with a nearby FM radio receiver, it is possible to tune the FM transmitter. Using the coil, either expand or compress the wire coils to change the frequency. A closer wire gap give a lower frequency and a loose wider spacing gap gives a higher frequency.

The completed solder side of the printed circuit board with a green loop antenna about 2.75-inches high and a microphone set outwards on one side to facilitate a good fit through the cabinet top. Prime use of this project is to fulfill the authors objective to own and operate a tiny radio station (at the toy level) - in this case, a tiny exampling FM band transmitter that can send broadcasting from one side of the table to the other side.

Apps won't end there as the transmitter can have audio signal input into its stage, such as a Parallax Propeller chip's voice speech synthesizer signal inside the electric brain in a jar, and then transmit a speech signal through the jar, speaking wireless into a nearby radio. Building one transmitter is very cost effective at US$4.
When soldering the electrolytic capacitors and the transistors, use a heat sink on each of the wire leads to prevent component damage from heat.

It is also possible to change the value of the ceramic capacitor which is in parallel with the coil. Some designs use a tunable variable capacitor to do the tuning. In this case, the variable capacitor would have a tunable range from 0 to 10 pF. Since this transmitter has no requirements for specific FM frequencies, the variable capacitor is not needed.

Experiment with the coil spacing first to determine the range. Keep the receiver at distance from the transmitter to minimize the reception of spurious radio signals. Make sure you've found the primary signal which will have the greatest signal strength.

Reference this image showing a different orientation for clarity, to the photo in post part number 2 for circuit path positions. Note the coil spacing to change the frequency to a "quiet spot" on the upper FM dial.
The 10 pF capacitor is set to match the number of turns on the coil. With a greater capacitor value such as 20 or 50, the number of coil turns would be too much.

Antenna Length
First, here are some "getting started" approximate values already calculated for some frequencies. A full wave antenna for 98 Mhz, the center of the FM band, would be 119 inches. A half wave would be 59 inches. A quarter wave antenna for 98 Mhz would be 29 inches long. Try an eighth wave antenna at 14 inches long or a sixteenth wave antenna at 7 inches.

Online Whip Antenna Calculator
http://www.csgnetwork.com/antennagenericfreqlencalc.html
For more precise values, enter the frequency and the online program will calculate half and quarter wavelength whip antenna size. Requires browsers with enabled Javascript. "This calculator is designed to give the vertical length (height) of a particular whip type antenna, or the frequency of it. Enter one (only one) value, the desired frequency or the antenna length in any length field. Click on Calculate and the opposite value will be displayed in feet and inches or frequency in megahertz (Mhz). These are considered as generic calculations and you may wish to use them to learn general information about the antenna structure you are contemplating. Click on Clear Values to prepare for new calculations. Any antenna created with this calculator MUST be fine tuned for VSWR. None of the calculations are rounded or massaged and all calculated results are raw data."

Frequency Stability
The frequency may drift as the battery voltage becomes less. This is expected with this simple design. To offer more regulation, one could use a regulated power supply instead of the battery. The simple design presented here for exampling will use fresh batteries and some frequency drift will be expected. Do not use an AC adapter as these are generally not regulated and introduce interference.

Use with iPod, iPhone, iPad
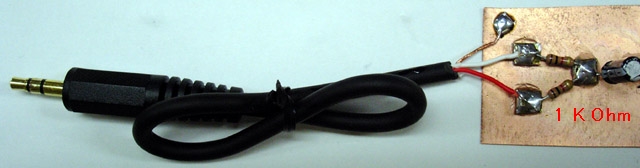
"The earlier model of iPod has an automatic shut-down system in it. When you pull out the plug of your headphone, it automatically stops working. When the left and right channels are short-circuited, the same thing happens. Presumably, you can use a stereo cable and solder the left (white) and right (red) lead together. Please use the left channel lead (white) only. Usually the left output is compatible with mono audio. If you, however, insist to mix the left and right output of your audio source into the transmitter, make a simple "interface" like this." Source: http://www.translocal.jp/radio/micro/howtosimplestTX.html

Radio Station Parts List
1 Resistor 820 Ohm
1 Resistor 4.7 K
1 Resistor 3.3K
1 Resistor 10K
1 Resistor 220K
1 Resistor 1K
1 Capacitor Ceramic Disc 10 pF
1 Capacitor Ceramic Disc .001 uF (102)
1 Capacitor Ceramic Disc .01 uF (103)
2 Capacitor Electrolytic 4.7 uF
1 Transistor 2SC1675 (or 2SC829) Q1
1 Transistor CS9013 Q2
1 Antenna Wire 16"
1 Coil (see text)
1 Electret Microphone
1 Printed Circuit Board
1 Enclosure
1 Printed Panel

Although controls are not necessary, adding a power switch and other capabilities may be desirable.

Spartan Version
On/Off Switch
A very spartan version with rudimentary controls is possible by using a rectangular project box with a hole for the mic protrusion and a hole for the on/off battery switch.

Basic Three Version
On/Off Switch
On the Air LED
Mute Switch
The on/off is a toggle switch wired to turn the 9 volt battery supply on or off.

The next upgrade can include a red LED for "on the air" monitor. This would wire in with the on/off switch and a dropping resistor to the LED.

Another handy feature is an audible mute switch. This would cut out the microphone and switch to a resistor with the same resistance as the microphone.

Deluxe Version
On/Off Switch
On the Air Red LED
Mic Mute
Variable Volume Control
External Sound Input
Signal Strength
Amplifier Monitor
Headset for Amp Monitor
External Power Supply
Switch from 3V, 6V, 9V (regulates output power)
2 Sound Source Mixer
External Antenna 1 or 2 

Band - With different switchable "band" coils, it would be possible to change the transmitting frequency.

Trim - With a variable 0 to 20 pF capacitor, it would be possible to tune the transmitting frequency.

Clock - with added processor
Compass - with added processor

SOURCES
http://www.translocal.jp/radio/micro/howtosimplestTX.html

FM Radio Station Part 5 Index
http://humanoidolabs.blogspot.tw/2013/12/fm-radio-station-part-5-index.html 

Monday, December 9, 2013

Cortex Brain Breadboard in a Tray Part 51

CORTEX BRAIN BREADBOARD IN A TRAY PART 51
EACH TRAY HOLDS A BRAIN CORTEX

Take a plastic veggi and rice food tray and recycle it for constructing solderless breadboard brains. The advantage is it holds all the tiny parts and the breadboard, and assembly can take place inside the tray without misplacing and losing any parts. Additionally, the trays holds all the parts collected for assembly, so access to assembly parts is swift. An assembly line could distribute completed parts trays. The photo shows a brain cortex being assembled inside the tray. The jar at left is waiting for the electric brain board.

The tray is ideal for assembly of multiple brain boards. Note the tray holds a double wide breadboard which can hold two Parallax Propeller chips or 16 computers. Also a chip for EEPROM memory can be included with each board. At right is a solar panel. Assembly hints: move the board to the left side and deposit parts on the right side. Another tray can hold assembly tools like a wire strippers, wire cutters, screwdrivers, and meter.

Index to the Brain Cortex
http://humanoidolabs.blogspot.tw/2013/11/brain-cortex-index-part-16.html

Sunday, November 3, 2013

Brain Cortex Update Part 17

BRAIN CORTEX UPDATE PART 17
MONDAY NOVEMBER 4TH 2013
A journey farther, deeper and longer than ever before into the deepest part of the electronic parts plaza took place yesterday.

— at the heart of this experiment, as part of the Big Brain project, is a special living cortex machine which is designed for human brain to machine transfer, and to extend the life of both symbiotic human and machine, in the most simplistic way, yet representative of greater things to come —
 
There's no doubt about the sacrifices made to keep this project going. The ravages of this often arduous journey have exceeded the extreme physical limits of any human — i.e. being thrown around on a violent bus with no shock absorbers, having a leg torn, a hip twisted and sprained, bruised and being trampled by enraged stampeding crowds of thousands of people, becoming car sick on the taxi with the driver from Hell, catching flu germs from thousands of people in small hot humid places, becoming lost amidst twisting streets with no rhyme or reason and maps that don't properly match the city jungle, and walking (5 miles) to reach a futuristic home in the sky. This also includes walking up six stories and back down again, and back and forth (yoyo effect), in the skyscraper of a parts plaza, because someone decided to turn off the elevators and escalators to save money.

However, on the flip side of the coin, the rewards are totally spectacular and great, mind boggling, like a great fantastic dream from the future, and the climb upwards from level 1 to level 5 inside the electronics parts plaza was like traversing the stairway to Heaven, as every electronic part in and beyond imagination seemed to be available.

The Cortex project now has the parts it needs and remains fully funded by Humanoido Laboratories and supporters and investors are fully in favor of ramping up and increasing the project to include not only the current cortex, but a possible array of new sophisticated and simplified demonstrative cortex' and a ramping up of human brain to machine transfer experiments.

The parts rewards this time include a new solar panel for a smaller test cortex, perhaps a micro cortex (smaller than the mini cortex) to be placed in the smallest jar, and a multiple power cell mount array for ten individual cells for the large cortex. It will also serve for other experiments and directly drive a Parallax Propeller chip.

A large number of brass hardware spacers were obtained to attach the power cell mounts to the jar walls. Phenolic insulators were obtained in a quantity large enough to earthquake-proof the jar to a higher level.

An instrument panel was obtained to read the voltage level and display it on a digital readout. This has two leads for the supply to power it and two leads to be used for the voltage input. Since the device has 3 leads, one is shared with the two inputs.

One challenge is reading the Chinese instruction page for wire connections because no schematic is provided. The device instructions are not online and so a translator is needed, making some delay for work on the control panel.

Brain Cortex Index Part 16

Wednesday, October 23, 2013

Brain Cortex Part 3 - Solar Panel

This solar panel will keep the cortex brain alive
BRAIN CORTEX SOLAR PANEL
Polycrystalline panel back side
This post represents more updates to our Brain Cortex in a jar project. The rabbit jar, as discussed in the previous post, has slightly squared off sides and this is a perfect form factor for the internal solar panel that will be statically mounted inside along the jar.

Walk in electronics store - Taiwan
POSITIONING
In this way, the jar can be positioned sideways stationary to gather in light relative to the incoming light angle of the source to create the Propellers power, without the problems of a round jar rolling around or deflecting the incoming light at various circular induced angles.

Homes Kit Solar Panel (Taiwan)
FUNCTION
The panel is fully functional with room ambient light, artificial lighting, and direct solar light. During the day when located in a room, the cells act as a trickle charger for the two 1.5-volt rechargeable AA batteries at approximately 1.3 volts. With more direct lighting, the Propeller chip is sustainable at its full requirement of 3.1 volts without battery deficit depletion.

Solar Panel SM-8656, 3V @ 120 MA
NO BATTERY NEEDED
Under certain lighting conditions where the voltage output is around 3 volts, the solar panel can power the Cortex without battery power.

DAY NIGHT MODE
We are working on a circuit that will automatically switch the Cortex from day to night mode. In day mode, the solar panel provides power and recharge ability, and in night mode the Cortex switches over to battery power.

SOLAR PANEL SPECS
The Solar Panel is purchased from the main electronics parts store. The Homes polycrystalline solar module is rated for operations at 3v @ 120 mA, part number SM-8656,  88 (L) X 58 (W) X 5 (H) mm, weight 35.85 grams. Homes provides a choice of 30 different solar panels and solar modules. Most of these are in stock at the electronics parts store mounted near the ceiling.

EXPERIMENT
In a typical experiment, the panel put out 1.3 volts in ambient room light and up to 3.4 volts directly under a high intensity lamp.

COST & POWER
The NT$299 (US$10.17) priced Solar Panel has a rating of (P=EI) 25 ohms, 0.36 watt as calculated based on its specification rating. 

ONLINE POWER CALCULATOR
Here is an online calculator for calculating power and other values. http://www.sengpielaudio.com/calculator-ohm.htm.

MANUFACTURER
The manufactures web site is at http://www.100y.com.tw/htm1/542901234.htm. As mounted and protected in the jar, the estimated expected life of the solar panel is from 20 to 40 years.

Thursday, October 17, 2013

Basic Stamp Discovery


STAMP DISCOVERY MAKES WAY FOR NEW SUPERMACHINES
GIANT BASIC STAMP DISCOVERY
While organizing space after several times of moving from lab to lab and home to home, some hidden dusty boxes were discovered way up inside the dark poorly illuminated back country of elevated storage land. When opened, the boxes held the greatest treasures of dozens of BASIC Stamps, chips, modules, boards, and parts! This opens the pathway for the construction of new Stamp supermachines.

— Halloween special true story

These treasured boxed caches of Stamp modules and parts were collected over the past ten years, and were located up in the tiny dark elevated loft, a place where no human dare go, especially in the month of October, when spirits, goblins, ghosts, vampires, and unmentionable creepy crawlies make their appearances...

It's the place where there's no space to stand up. On your hands and knees, you crawl around with other things that also crawl. They seek the warmth of your pants, and once they get inside, they love to bite.

If you're brave enough to temporary withstand the horrendous heat and fling your face into the dimly illuminated dusty dark creepy crawly realm, or suddenly encounter a sticky spider cobweb of immense proportions flapped abrubtly into your face along with its large ugly black furry resident inhabitant, or endure any scarey small spaces closing in on you creating confining claustrophobic tendencies, this is surely the place to go, explore and realize the full peak of your greatest fears!

Treasure hunters are often brave souls, willing to temporarily endure such challenges, with the thought of treasured discovery in mind. Suddenly, a treasure cache of boxes was discovered, filled with dozens of BASIC Stamps, modules, chips, boards, kits, and parts, enough to design and build the next generation massive and powerful Stamp supermachine! The cache discovered will undoubtedly lead to greater, larger, and considerably more powerful BASIC Stamp supermachines!

Sunday, August 11, 2013

Shopping Electronic Parts

REPUBLIC OF CHINA - SHOPPING ELECTRONIC PARTS
One crazy day at the electronic parts center

These are the results of a very interesting yet crazy day shopping at the electronic stores. Outside it seemed like another planet, closer to the sun in orbit, with a temperature rising past the 100 degree mark and a greenhouse effect wildly run amok with relative humidity approaching an unbreathable 100%. (NASA space suit desired here...)

Stepping outside, the brain-numbing, scorching, burning heat and white-out blinding sunlight was destructively intense. After donning sun shields and taking the widest spread of a fiberglass manual Chinese fan, one could see many people walking on the road with umbrellas to shield from the glaring, all-piercing, intensely hot solar rays.

Trying to ignore global warming, an air conditioned taxi was flagged down. Upon arriving at the stores, walk down the long flights of stairs into the basement - the first objective was to find a small wireless camera. Fail. The next item on the shopping list was a small RF TV. Fail. The next item was a small NTSC TV monitor. Fail. By this time and after shopping 6 and then 12 stores, things were becoming a bit discouraging.

Oh look, there's a small wireless camera under the display glass. No one will remove it and no one will help. Finally, going back to the store after a while, another clerk says, "we have no cameras..." Time to move on...

Making it more simple, moving onto the toggle switch section, hundreds of switches needed to be sorted, tested and tried just to find the correct one. These were very odd 6, 8 and 12 pole switches, or they spring returned to a common position, or they had very strange tiny short toggle stems only a quarter inch long. After a long time of searching and being bumped by hundreds of people, Bingo! A good SPDT tight toggle switch with a decent size stem was found. The next step was to sort through thousands in the bin, weeding out all the incorrect switches that didn't belong there, and test each correct switch. Finally, about 30 switches were found, tested, and placed into the shopping basket. These were $.63 each at a cost of $18.63. Score.

Next up was wire. Although three large size rolls of red, black, and yellow wire were purchased, it was a complete fail. All three were labeled AWG24. A store clerk confirmed the wire size and that it was single strand. After arriving home miles and miles away and opening the packages, the black was a much smaller size (too loose inside breadboards), the yellow was also too small and multi-strand, and the red was also not correctly packaged as it too was multi-strand and too small. Complete fail. These rolls were $2.94 each for a loss of $8.82.

Moving on,  for $2.94 was a plastic box with preformed, trimmed, assorted colors and sizes, solderless breadboard wires. These fit the breadboard perfect. Score. (It was vowed to obtain these from now on for breadboard work)

Looking for two mid-size solderless breadboards... score at $2.73 each.

Then it was on to a short time browsing. A small Hi Fi 20-watt amplifier was found that could run on a 9-volt battery, with all the connectors for input, output, power, a variable volume control, and a good frequency response of 22 to 22K Hertz for $6.87. Score. (though this is still untested)

By this time it was irrefutable, the effect of seeing so many varied electronic parts generated a feeling like a kid in a candy store. Candy was everywhere! If only we could live and eat here! Alas, the day was over, it was dark outside and the stores had closed. There was no place to shop. It was time to find the bus, prepare for some walking, and take a couple hours in the heat to go home.